I have many irons in the fire right now, which unfortunately doesn't leave a lot of time for art making; however, I am working on a new art quilt for myself and hope to be able to work on stitching it today. I am planning to enter it into the Old Rock School Open Art Competition this week.
|
We had a wonderful Shibori dyeing class today! We were a small group, but that meant we could giggle and play all we wanted, and that we did! I have been promised pictures, so I will happily post them when I receive them.
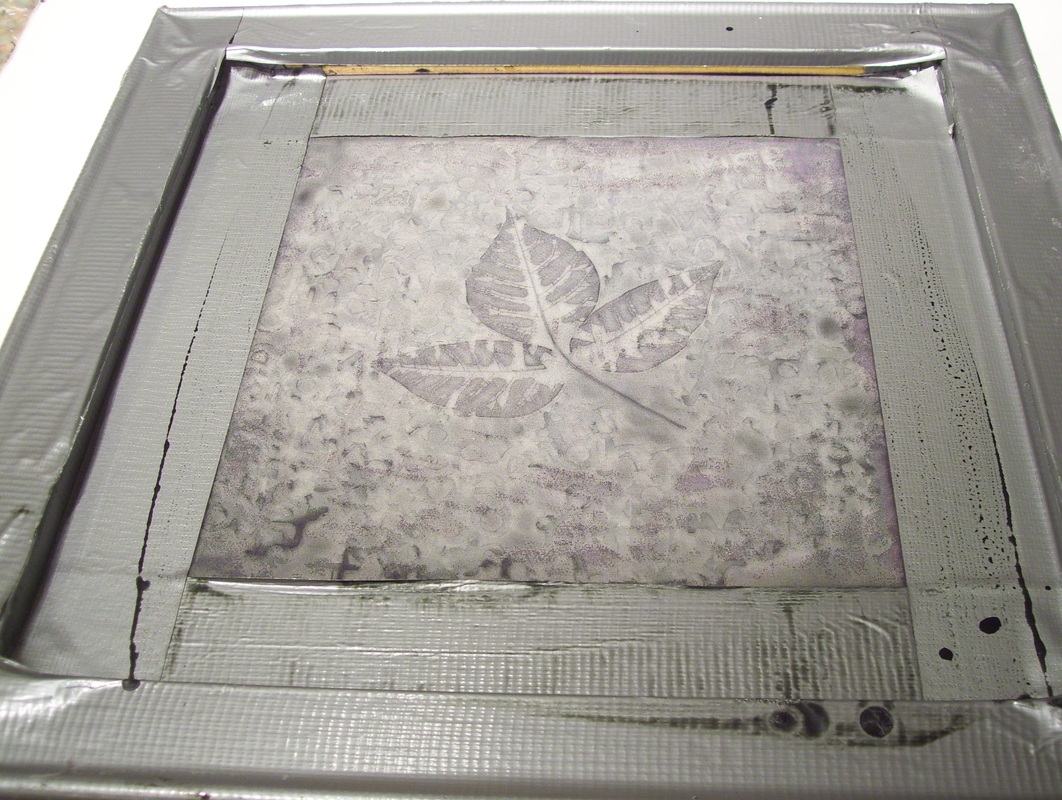
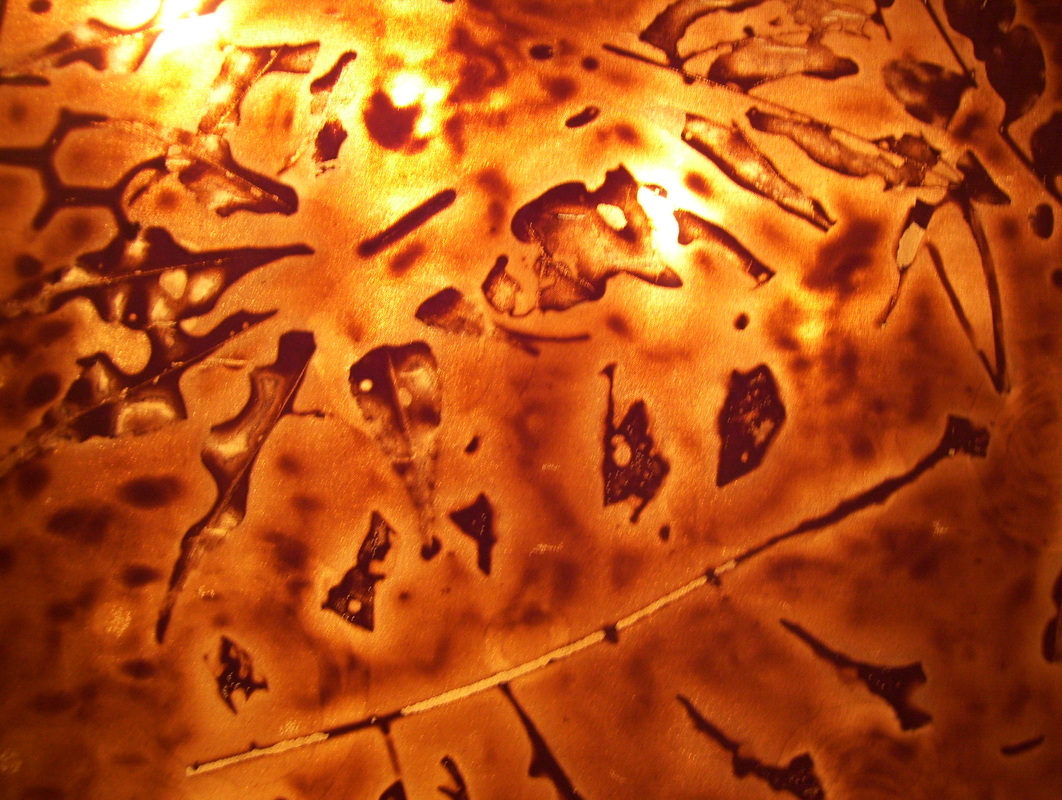
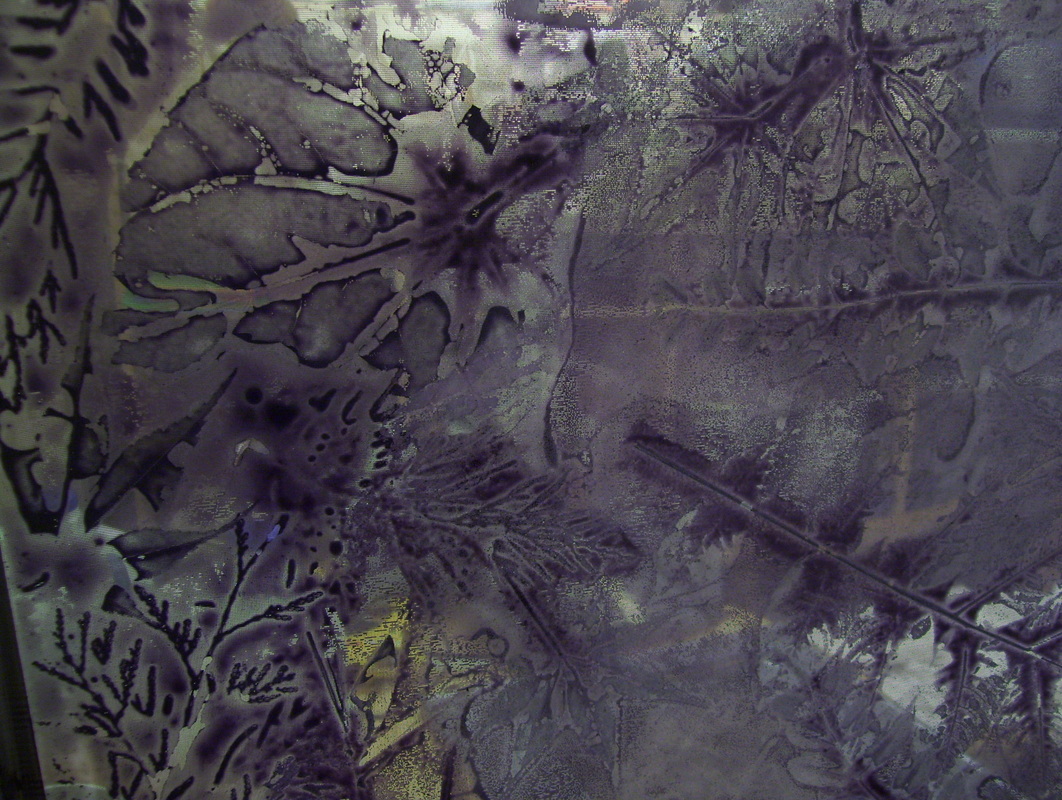
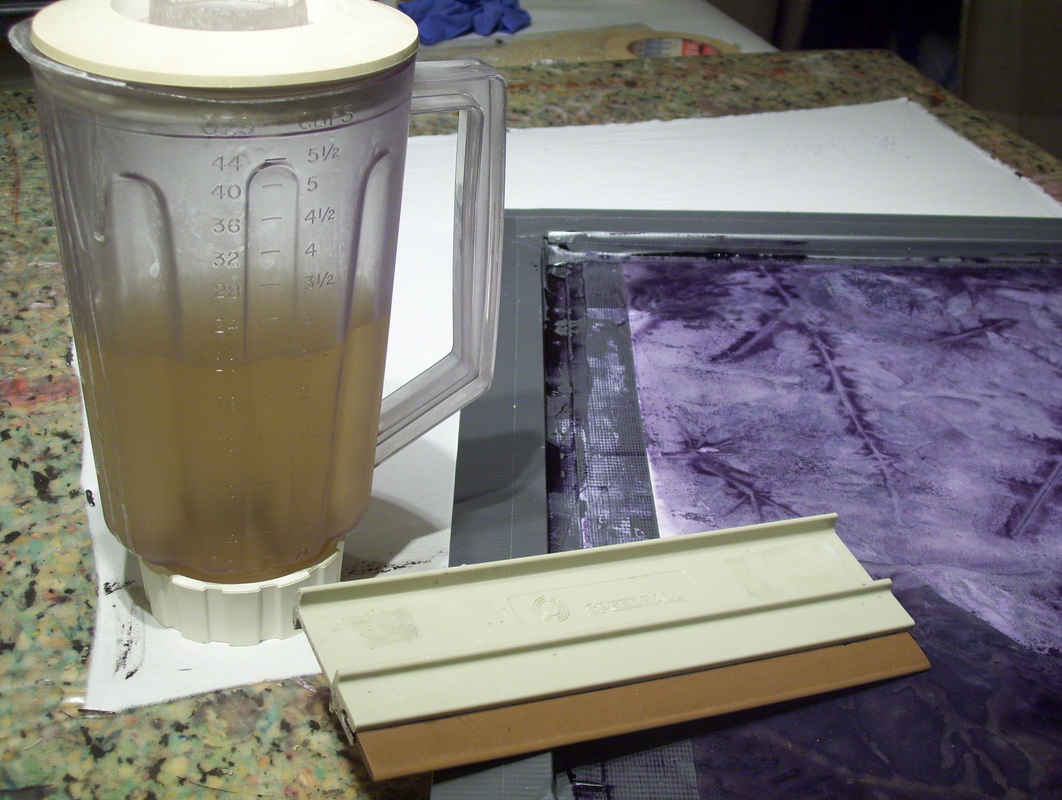
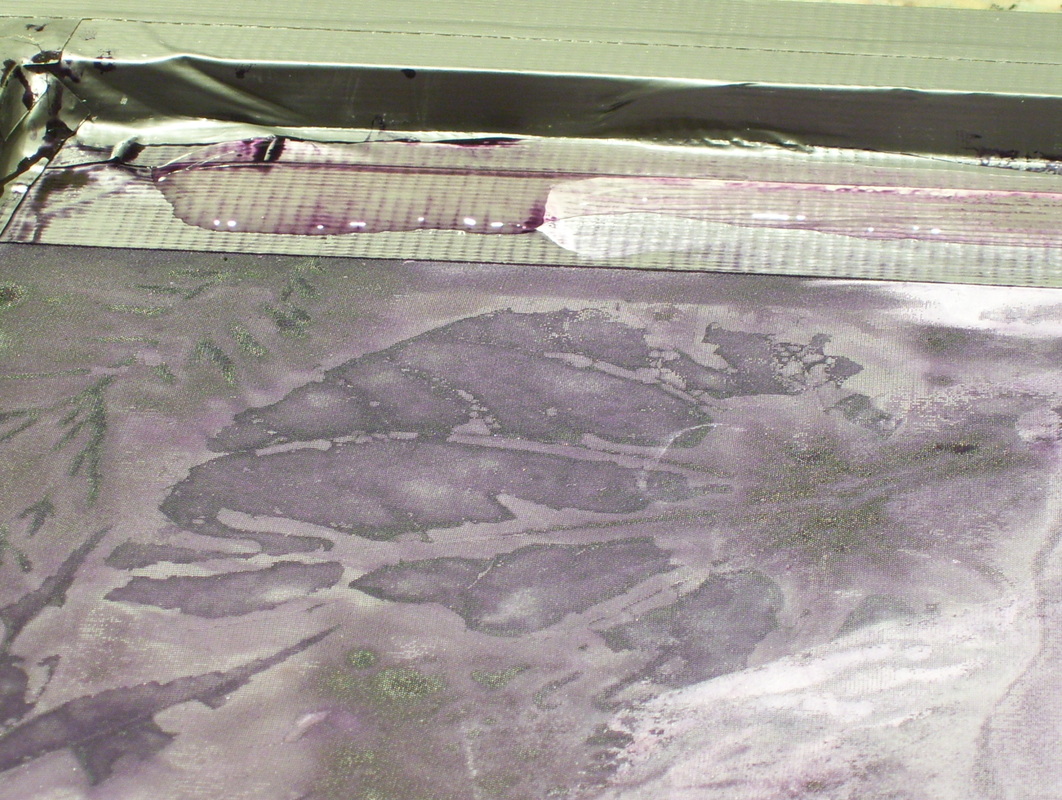
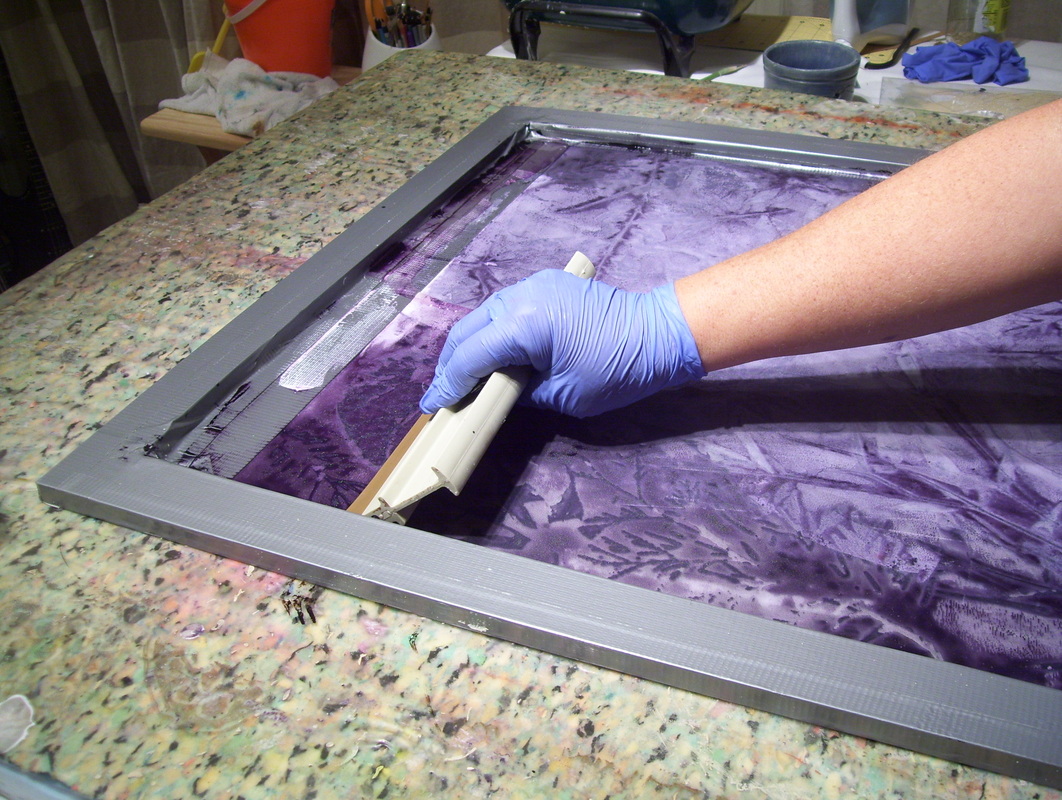
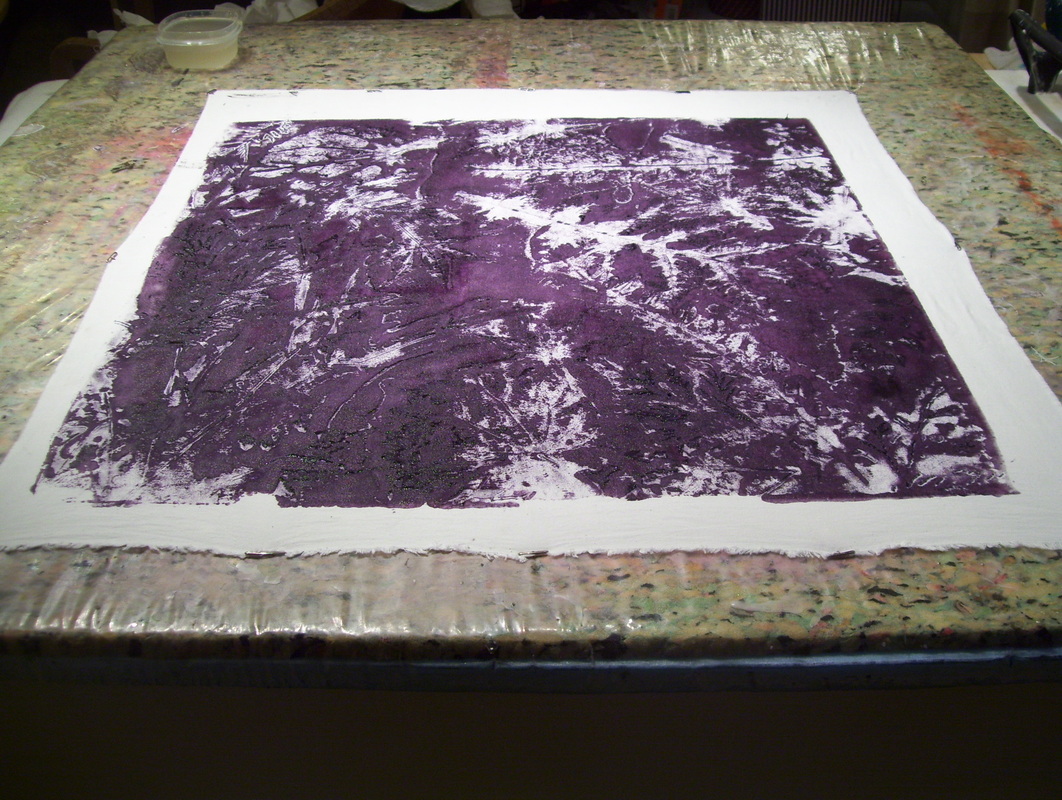
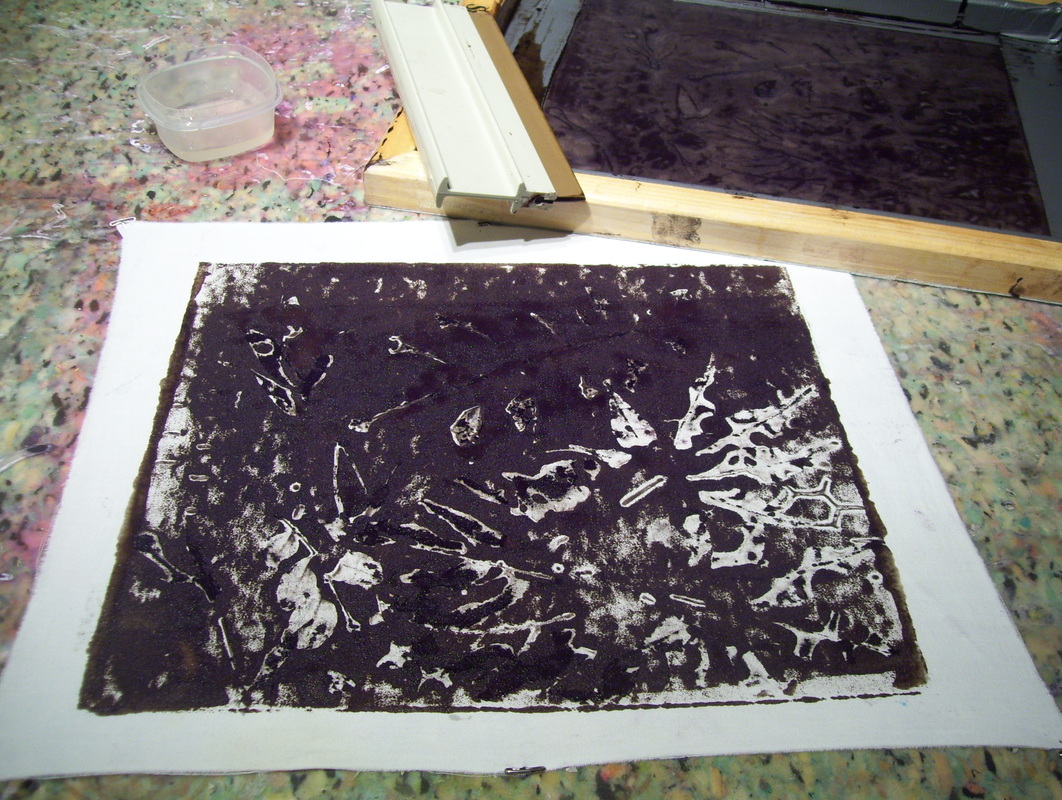
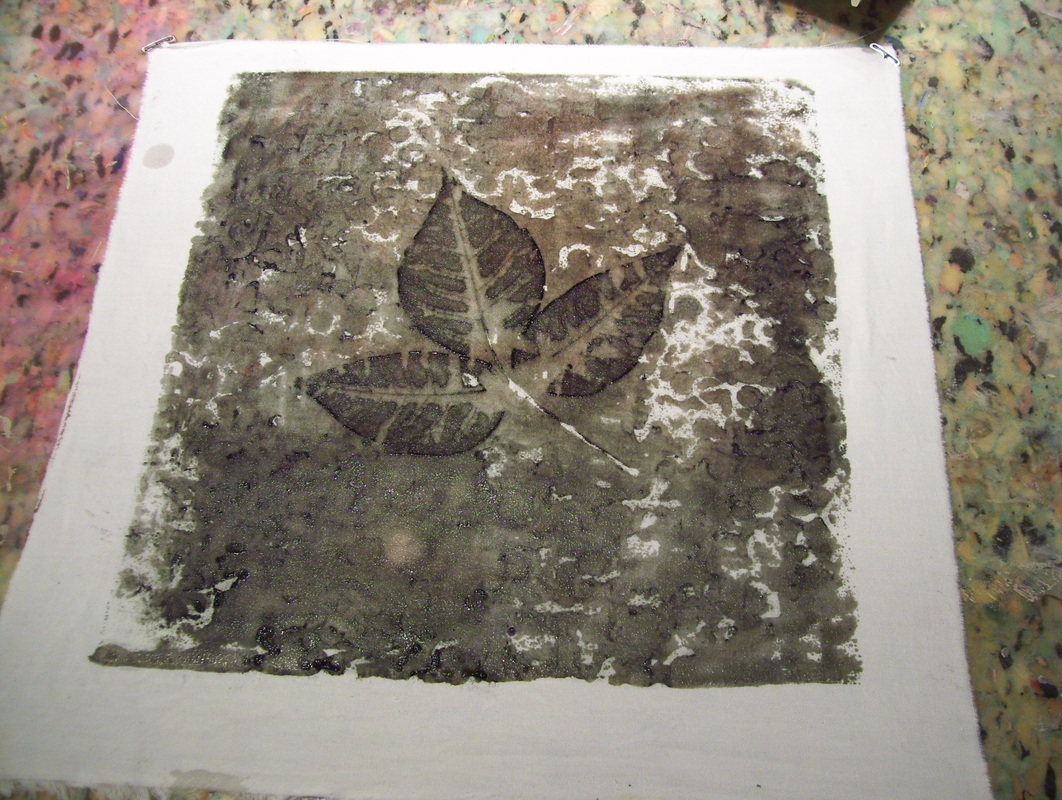
I had some time to myself yesterday, thanks to my wonderful Mother and Father-in-law, so I was working on my Healing art quilt and had some thickened dye left over. I try not to waste anything, so I thought about what I could use it for. I have been missing deconstructed screen printing so much, I decided to get in there and have some fun! Carpe Diem!! Nothing in visual art grabs me and moves me quiet the way interesting textures and organic shapes do! And in my work I am constantly looking for new ways to make a new kind of mark. This technique was one of the first I learned about as a new fiber artist, but as many of you know, every time you use a technique, you learn something new. If you haven't done this, try it, and don't have any preconceived expectations when you do. Just say, "whatever it looks like, that's what it is," and go from there. In my opinion, this technique produces some of the most interesting designs and patterns EVER in surface designing! Here's what I did, and how it turned out: 
The first step in making a deconstruction screen (after the actual screen itself is ready--that's a whole other tutorial :), is to decide what flat objects you want on your screen to create the lovely texture you are seeking. I knew I wanted to use leaves in the foreground and something textural in the background, because you want to fill up your screen space if you can. Once you put your items under your screen on a print board, mix your dye color with your print paste (more on this later) and using a Squeegee apply the thickened dye to the screen making enough passes to saturate the screen. Leave everything as it is, removing nothing, but try to see if you can turn it over and let it dry overnight. You can dry it manually with a hair dryer, if you can't wait (I understand :) If you can't turn it over without disturbing it, then leave it upside down on the table to dry. I used tape, because the green safety screening did not want to lay down flat. This is the back of the screen after it had dried overnight. Sorry, I took the other two apart before I thought about snapping a picture.

You CANNOT forget this last part, you must "Batch" your fabric after you have done your screenprinting on it. It won't lose all of its color if you don't, but it will lose a lot of it, so don't forget. To batch fabric, you simply want to wrap it in plastic and expose it to heat of some kind, this will increase the amount of time that the dye has to interact with the fabric, making the molecular bond stronger and producing more vibrant and true to life colors. I use a heated blanket to batch my fabrics, I wrap each piece separately in individual pieces of plastic, wrap them up making them kind of air tight, and place them in the folds of the blanket and turn it on high over night. My blanket does not get very hot, so I have to use the high setting, which seems to work perfectly. I have also found it works great to put the wrapped plastic in the rear view window of the car outside, if it is hot outside. You have to find a way to expose the pieces to heat while they are bonding with the dyes. Some people steam their fabrics, but I'm not a steamer, I tried it and didn't like it...

I couldn't resist sharing this picture that I spotted while I was rinsing out some dyed shirts that I made for the Arts Center. It took me back to the days of when I started working with dyes in the kitchen about 8 or 9 years ago, and when I had to keep my print paste in the fridge upstairs, because I didn't have another place to store it. This is a "no-no," always try to keep your dye materials separate from your eating area, if you possibly can. I am so thankful to have a place now to work, which is NOT in my kitchen and dining room!
So, there you have it, Deconstructed Screen Printing, it's fun, it's fool proof , and it's very forgiving! Have a blast, and if you want to know more about it, check out Kerr Grabowski's DVD, that was my favorite place to learn about doing it! She's the creator of this technique and she is very entertaining to listen to and watch. Wait for the line, "dirty alginate, sounds like the name of a band," giggle, giggle--she is hilarious!
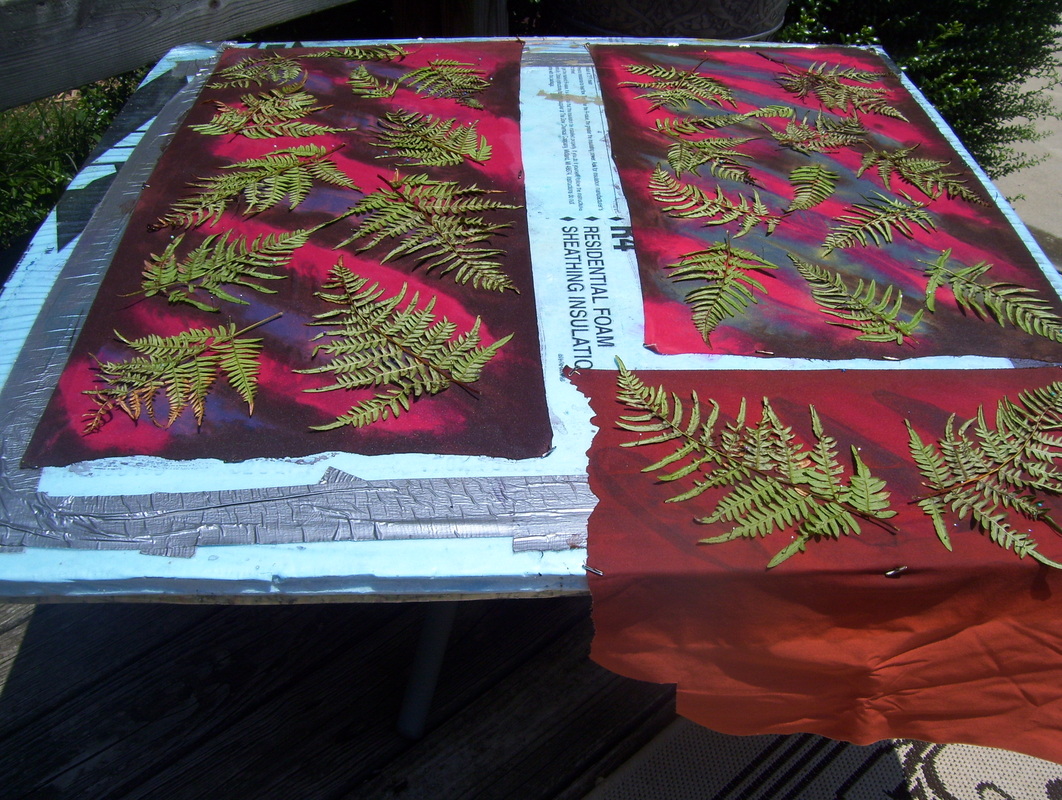
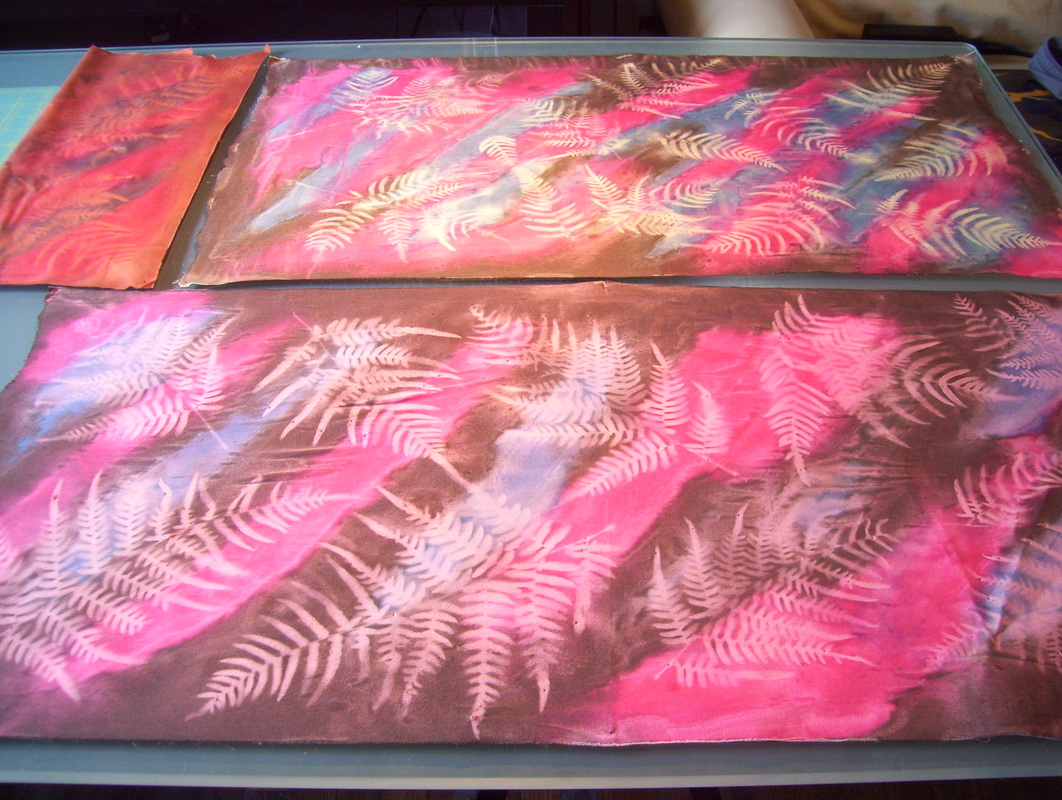
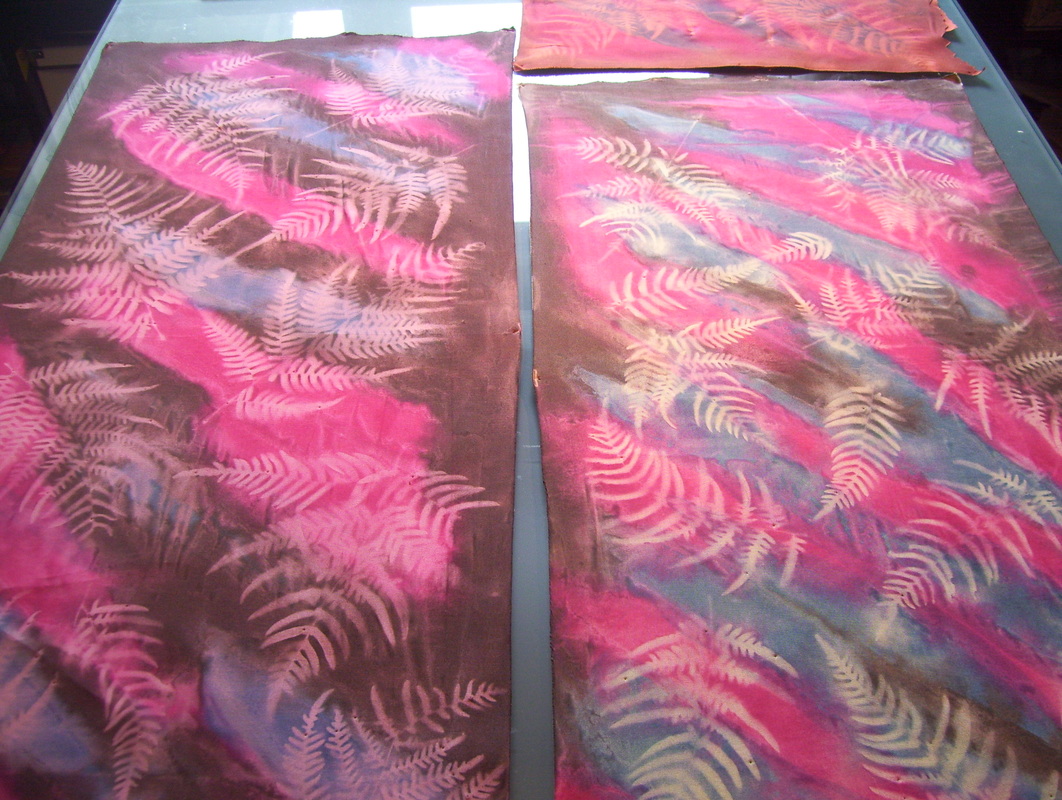
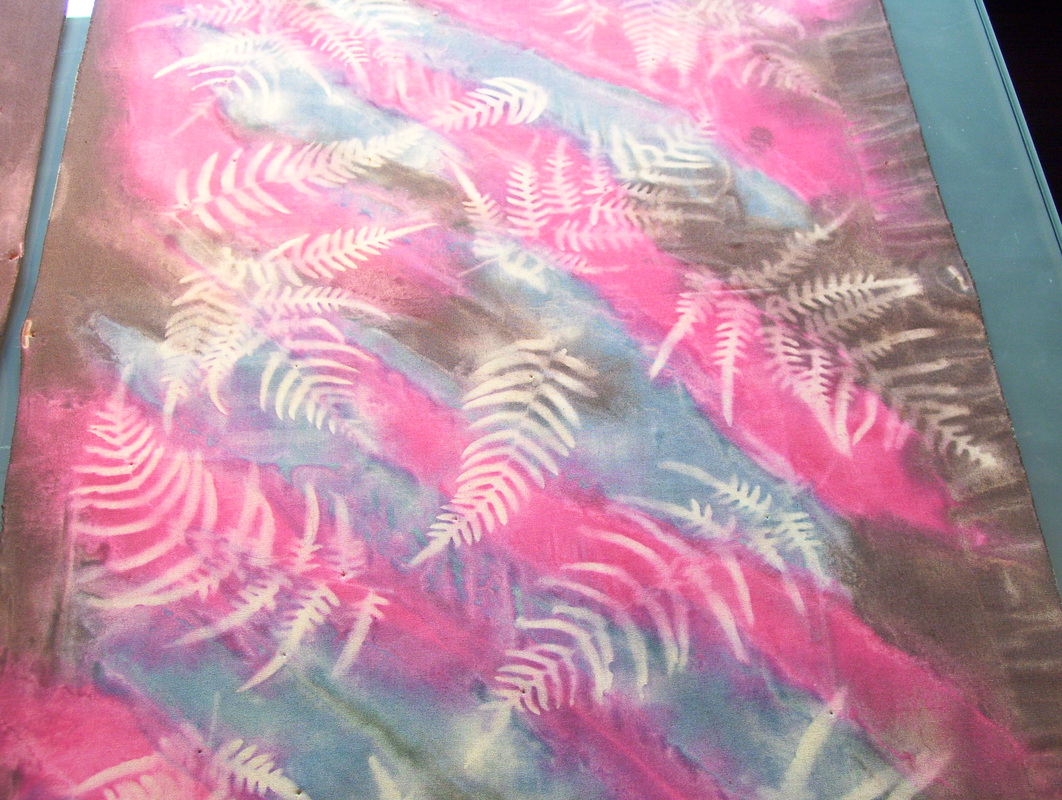
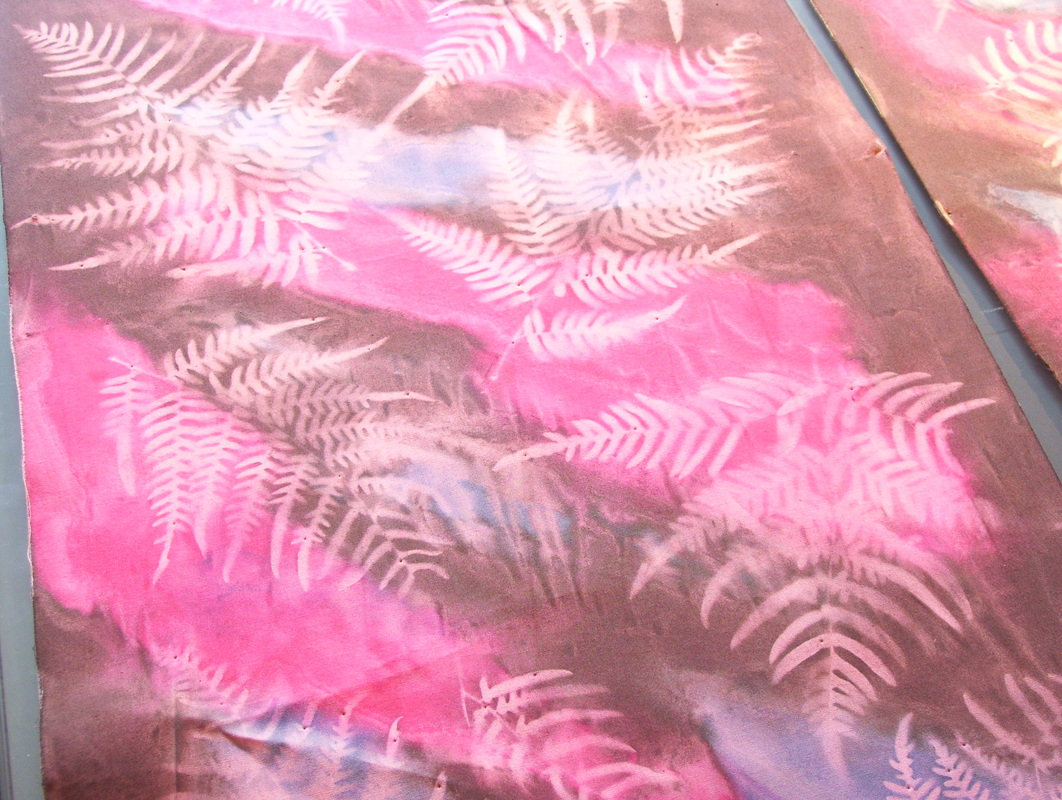
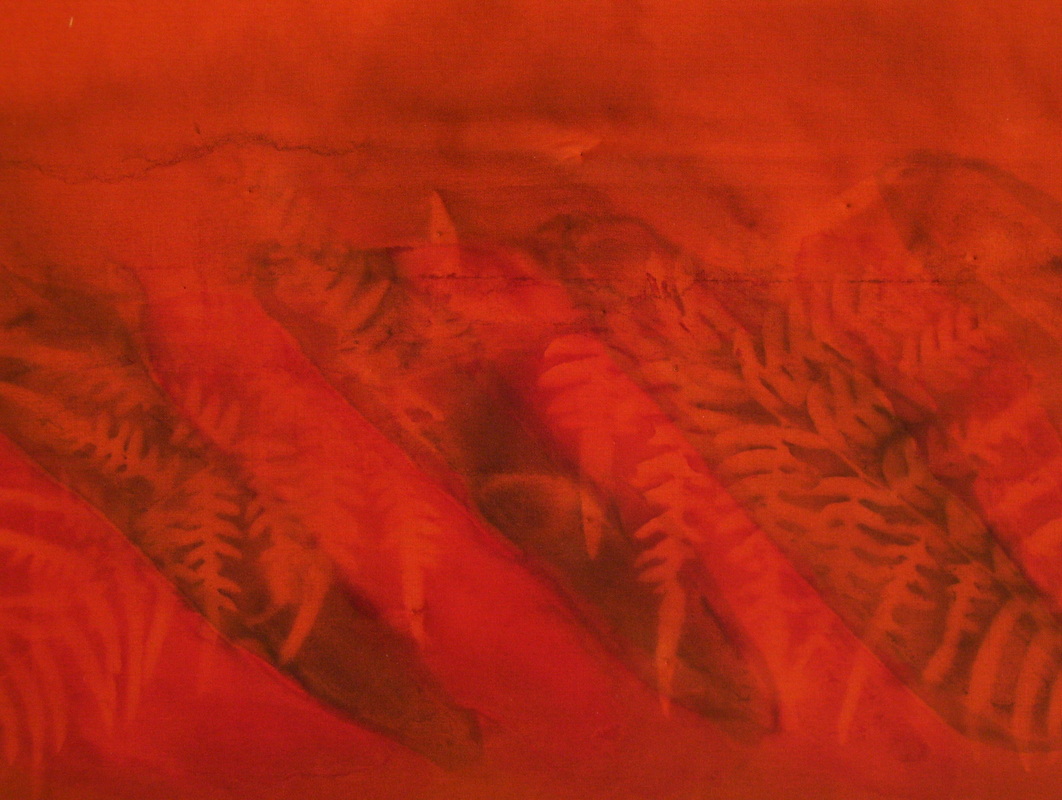
After going for a long walk in the woods yesterday, I spotted some beautiful ferns that screamed, "take us home and do some sunprinting with us!" And so, I did. I love this technique, it's easy to do, and basically fool proof. Here's how it turned out.
Now, I will heat set these colors with a hot iron, making sure to cover all of the fabric. After that, I could paint on top again, add another layer of leaves and add more depth and texture to the fabric, and these fern impressions would remain; or I could use it as is. The colors are washable as long as you heat set with the iron. I used Pebeo Setacolor Transparent paints for this project, in indigo, oriental red, and velvet brown. Give this technique a try, it's quick, it's easy and lots of fun to do and see what comes out in the end.
I completed a new necklace and pair of earrings today. I love the shell beads, lower right and upper left, that were broken and just nest together with the most beautiful shades of deep rose and dark gunmetal gray mingling inside. This necklace can be dressed up or down, and will wear very comfortably with no large beads in the back to irritate your neck. These pieces will go to the Valdese Heritage Arts Center for sale, as well as in my online shop. I hope you like them. 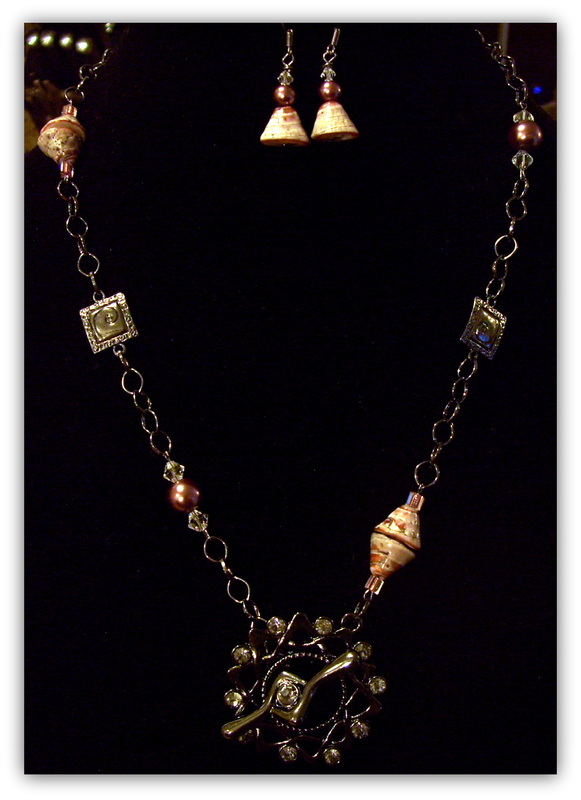
Facing two new health challenges, I decided I needed a healing tree art quilt near me daily, so I started this new piece. It will hang in my upstairs studio and contain only scriptures about healing. Here you see the batiked tree on heavy weight cotton. I used a tjanting tool, and later a large brush to fill in the outline of the tree, using melted soy wax. This fabric has been pre-soaked in soda ash solution and is pinned with T pins to my favorite print board (I'll have to do a post on how we made this print board, because I love it so much, you must make one for yourself, so you can love yours too!). Now it is ready for the thickened dye, which I usually apply with an old credit card for the background. This is how most of my art quilts begin. In this piece, I dry brushed some of the soy wax into the background as well to give it an aged, antiqued look. Right now, I'm picturing purple colors to match my studio, and maybe some brown and maybe even a little blue in there somewhere. 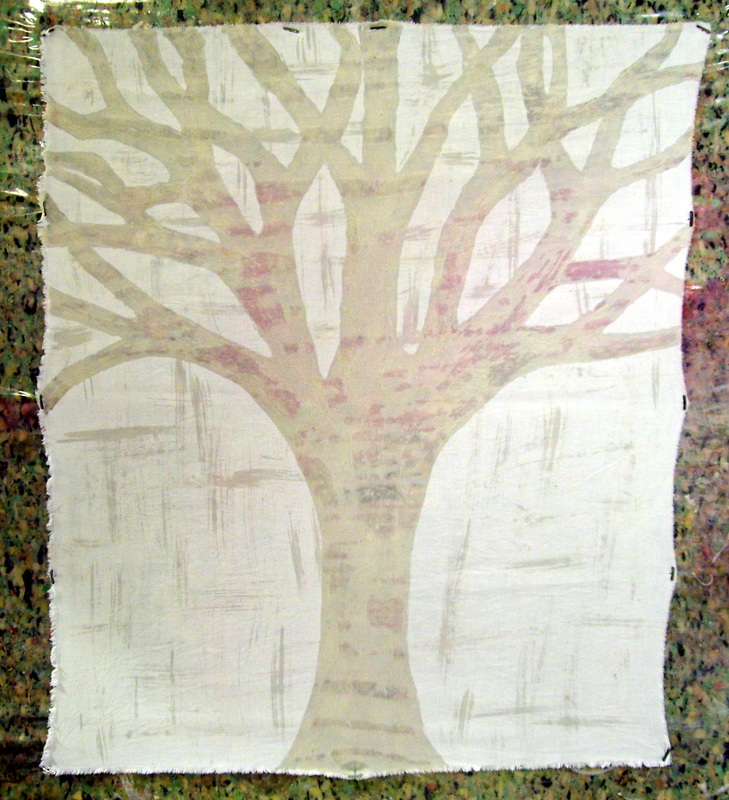
The pink areas is where you can see the colors of the print board behind the fabric through the melted wax. Sometimes I take the waxed tree off and scrunch it up to create lots of veining for the dye to run into, but this time I plan to leave it on the board and apply the dye without breaking the wax up.
Still working on adding to my inventory at the Valdese Heritage Arts Center and My Shop, so today I am sharing two new pieces. Neither seemed to translate well through photographs...so if you're local, head on down to the Arts Center to check them out for a better view. 
This piece is called Seed Pod Envy and it is 8" x 10". It is a holographic piece, which is not translating really well through photograph. I used two of my own photographs and transposed them together in Photoshop and then used a unique filter on them to bring out the interesting patterns in the photographs. One layer is printed onto cotton twill, and the other layer onto silk organza and both are applied to stretcher frames. The border is a soft pink high quality cotton dyed fabric, which was donated to me by my dear friend, Beth Bailey, (thanks, Beth!), and thread stitched with batting added inside.
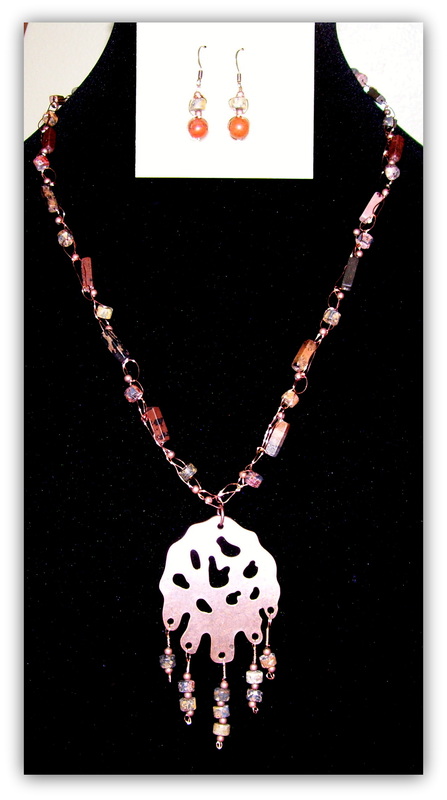
Feeling like making jewelry again, I crocheted this 26 gauge copper wire and incorporated Jasper stones in two sizes and copper spacer beads for accents. The earrings are copper wire wrapped as well, although it is not showing well in the photograph (sorry, about that.) This piece is about 23" long, very light weight and goes with lots of colors!

Here is a close up showing a little more detail of this pretty set. All of the findings used in this set are copper also. This is a rich looking, dainty set which will look beautiful with lots of earth tones and naturals!
Added a new piece to the shop today. This one is highly textural and visually interesting! Cutting away those layers to reveal underlying colors and fabrics is a bit like therapy and peeling away psychological layers to get to the root of where someone is really hurting--not always easy to do for any of us... 
"When I'm Healed" 18" x 24" Custom oak frame in dark espresso color. Silk, cotton and flannel fabrics that have been dyed and watercolored and then used reverse applique technique to reveal underlying colors.
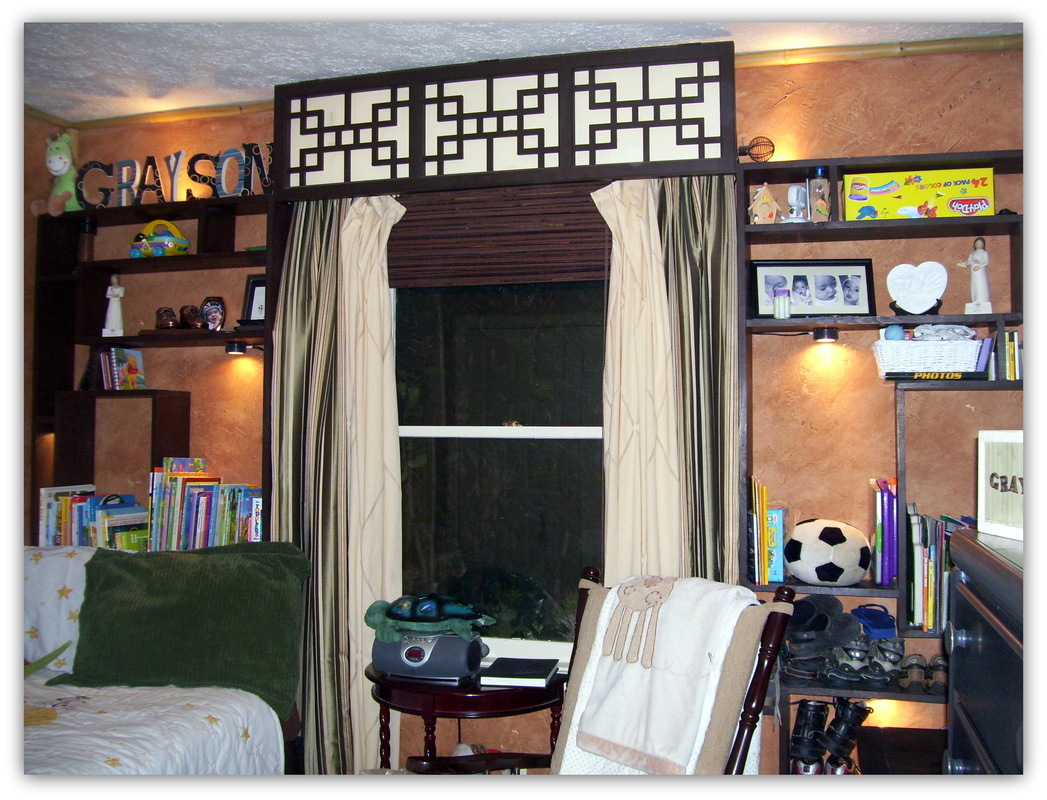
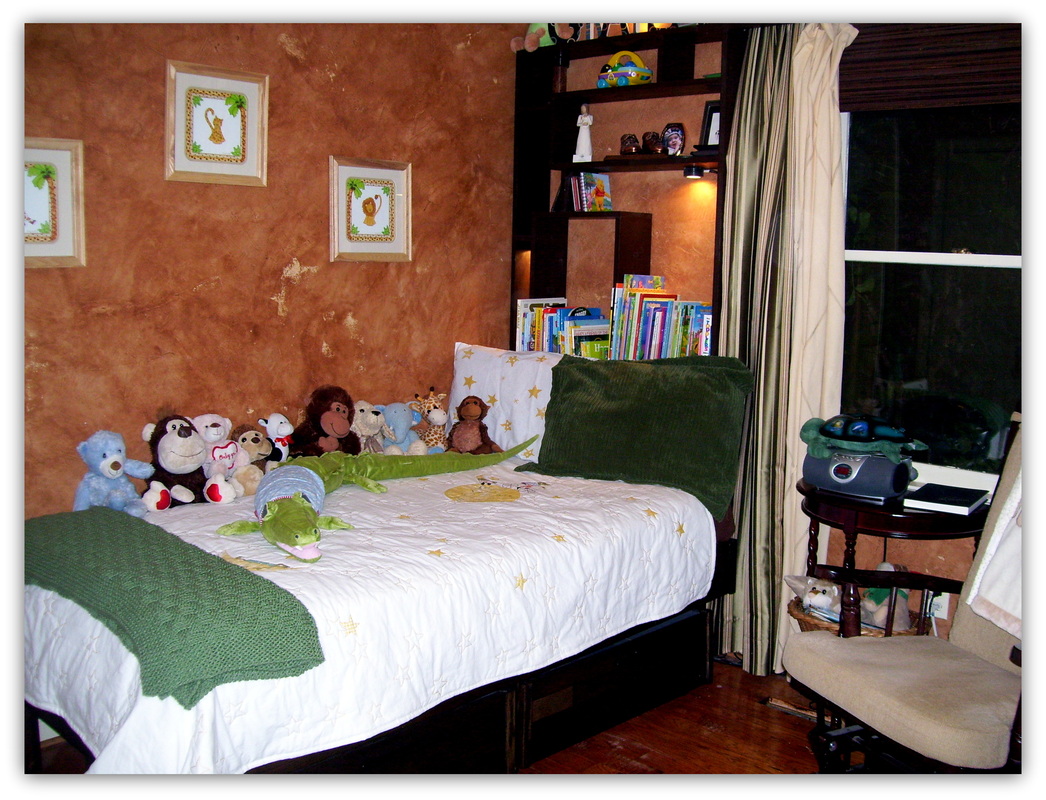
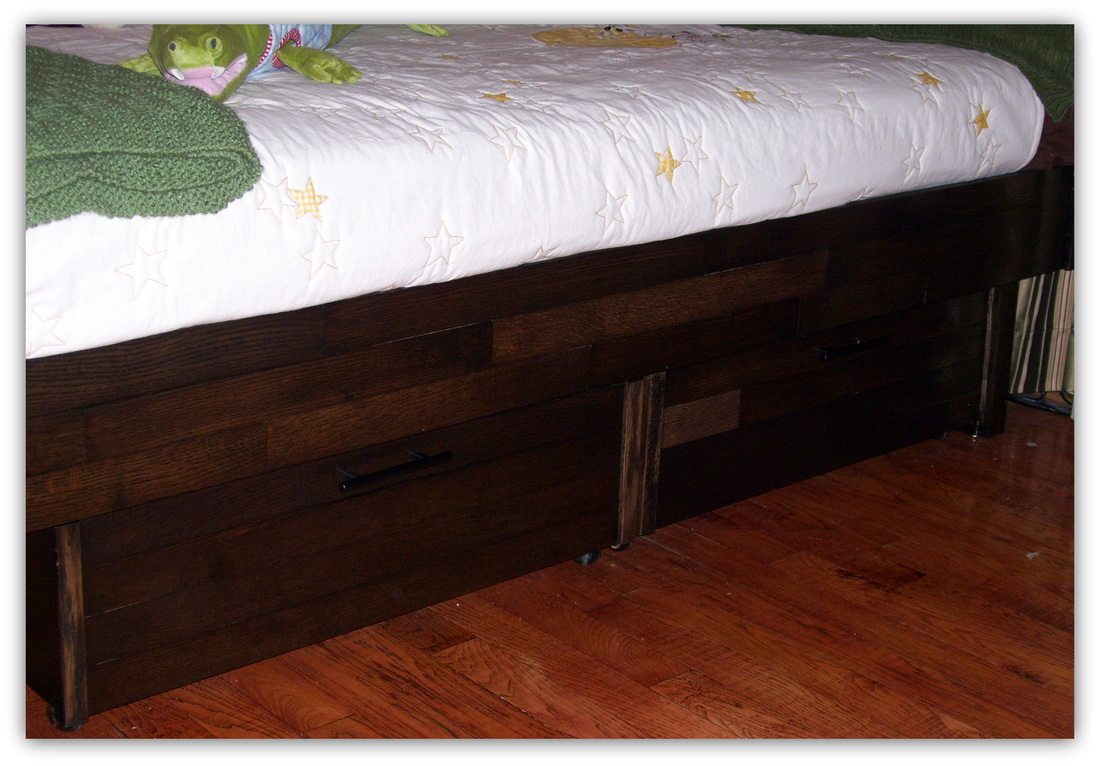
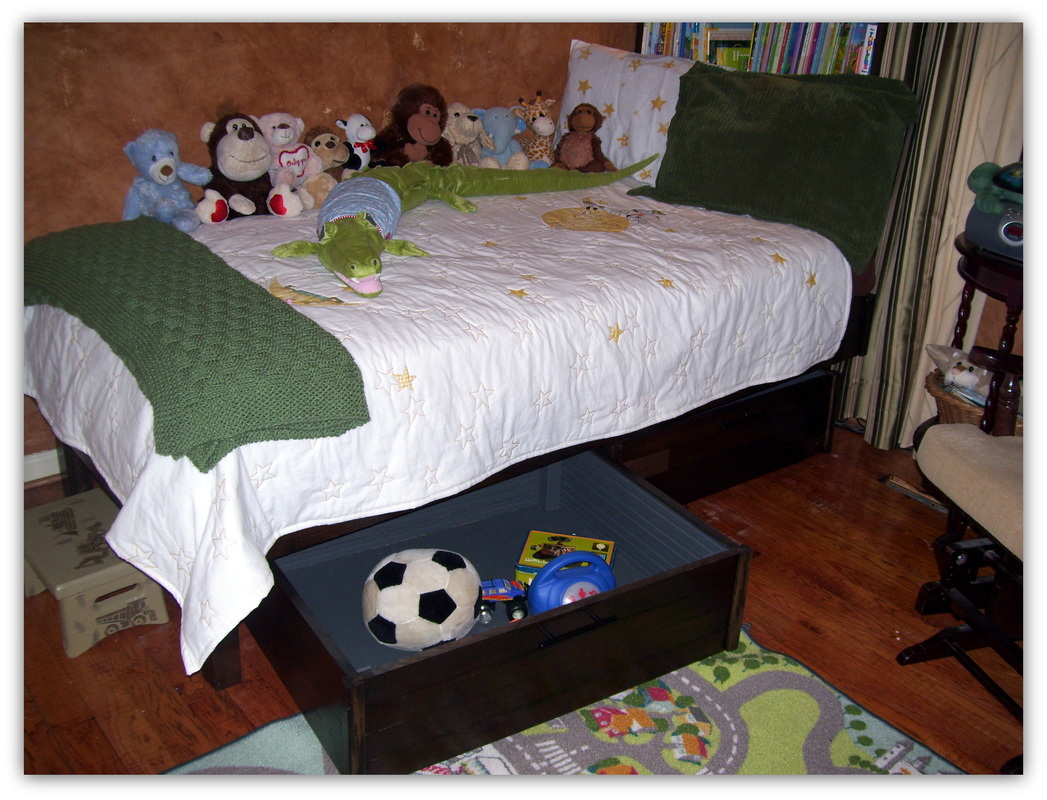
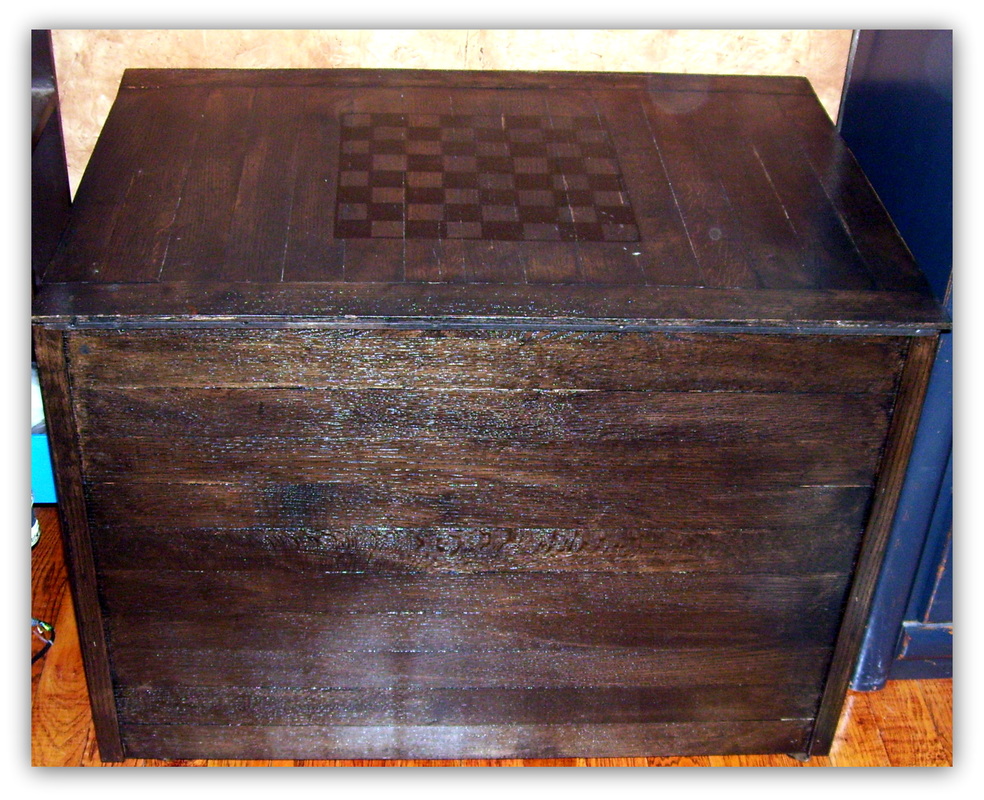
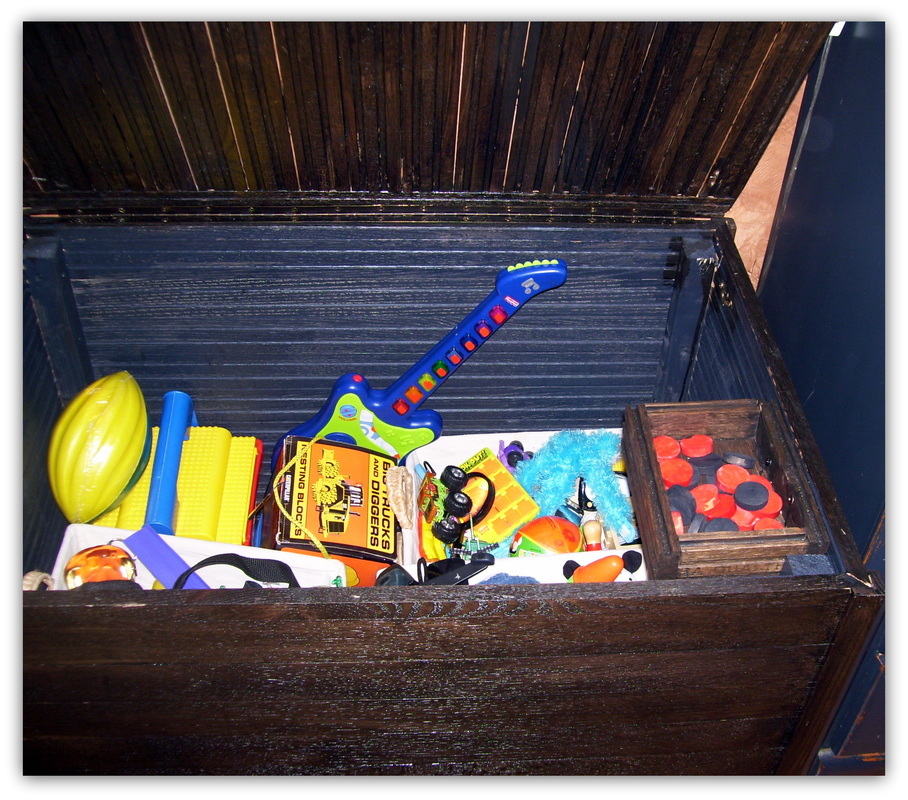
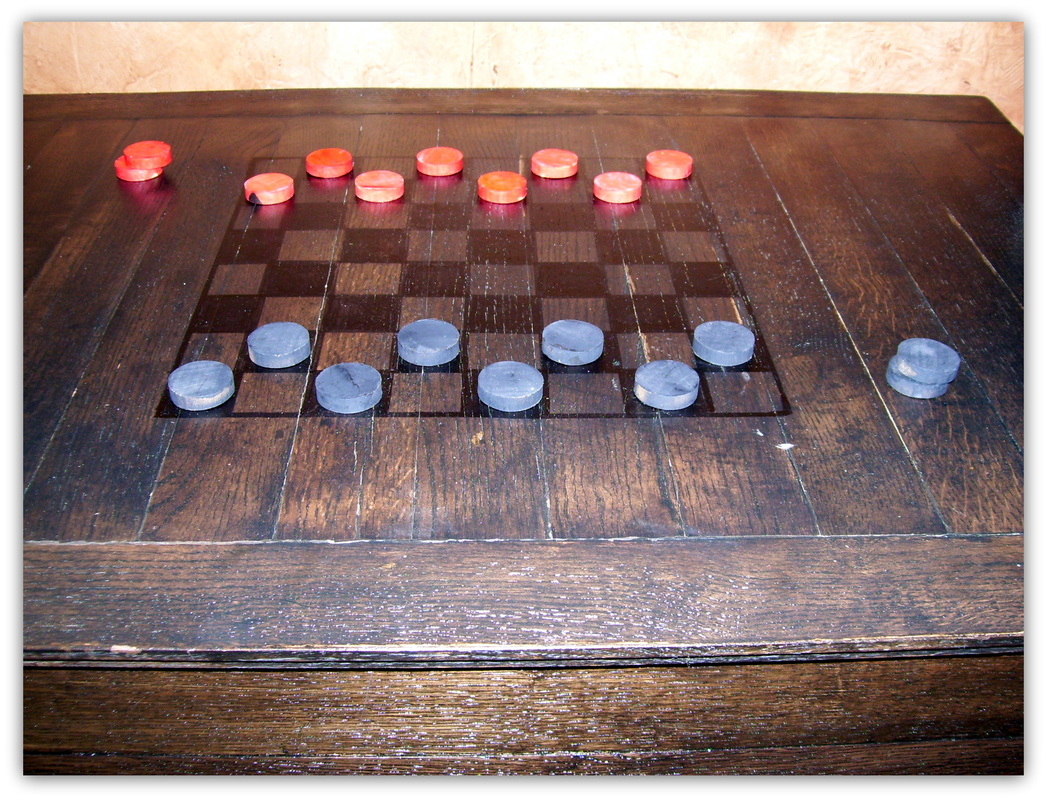
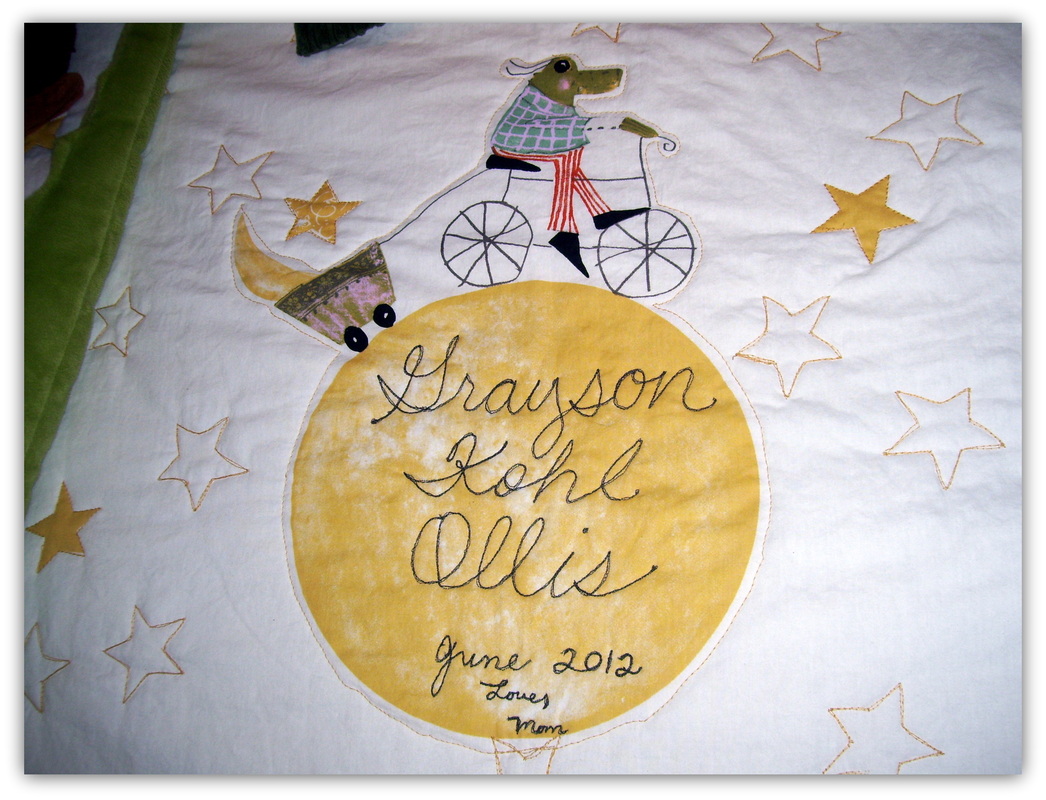
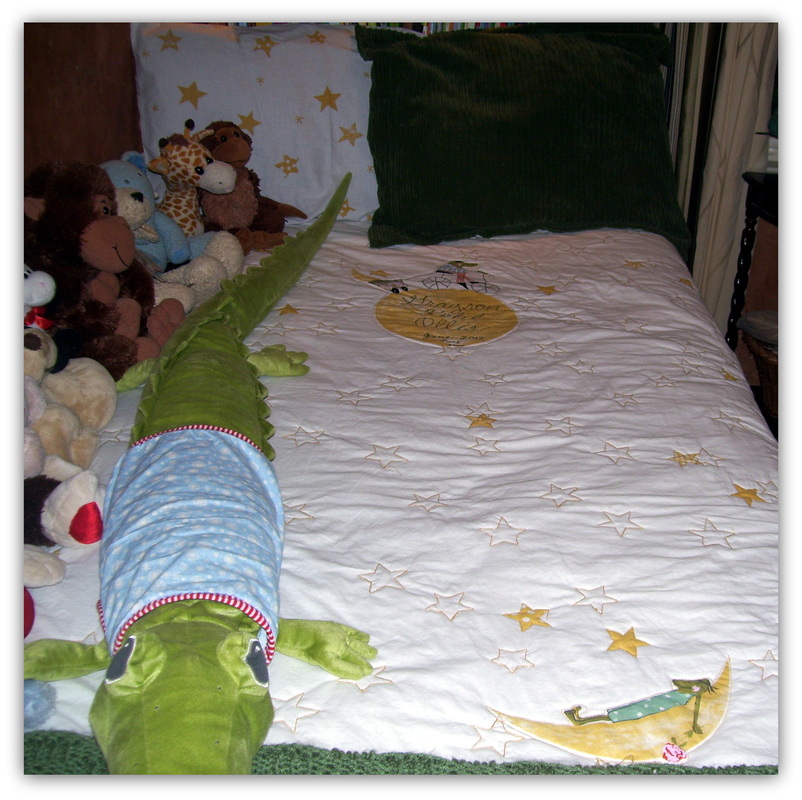
We have a precious little four and a half year old son that we are so thankful for. Recently we decided he had outgrown his toddler bed and was ready for his "big boy bed," so we put our heads together and multiple projects followed (we like projects): Daddy decided he wanted to make the new bed, with drawers for storage underneath, and a toy box to match; Mommy decided she wanted to make a quilt for the new bed; and so they started planning, gathering tools and working diligently on the new projects...now the projects are all completed, and Grayson has a new room. I've shared some pictures here of his new little space, if you'd like to see it.
As I worked on these projects with my husband, and put this entry together this evening, I was struck by how fortunate our little Grayson is, he seems to have a 'charmed' little life. I am so thankful for him and that he has so many people who love him so deeply, there is nothing more important in all the world than that!!
I received a call from the Arts Center the other day and they informed me that a framed art quilt had been sold, so today I stopped by to drop off some more business cards and post cards to add to the front advertisement of my classes and was able to see which piece had sold. Turns out, it's "Free," and I'm so happy to be sharing this piece with the person who bought it. My first thought was, "oh, that little piece had so much meaning, and I'm so happy to know that someone understands the messages I am sending with this piece." I imagine the piece in its new home on a lovely soft cream or sage green wall whispering affirmations again and again about what it means to be "Free." My guess is, it holds many meanings for many different people! Purchaser, I hope you will enjoy your new addition. :) 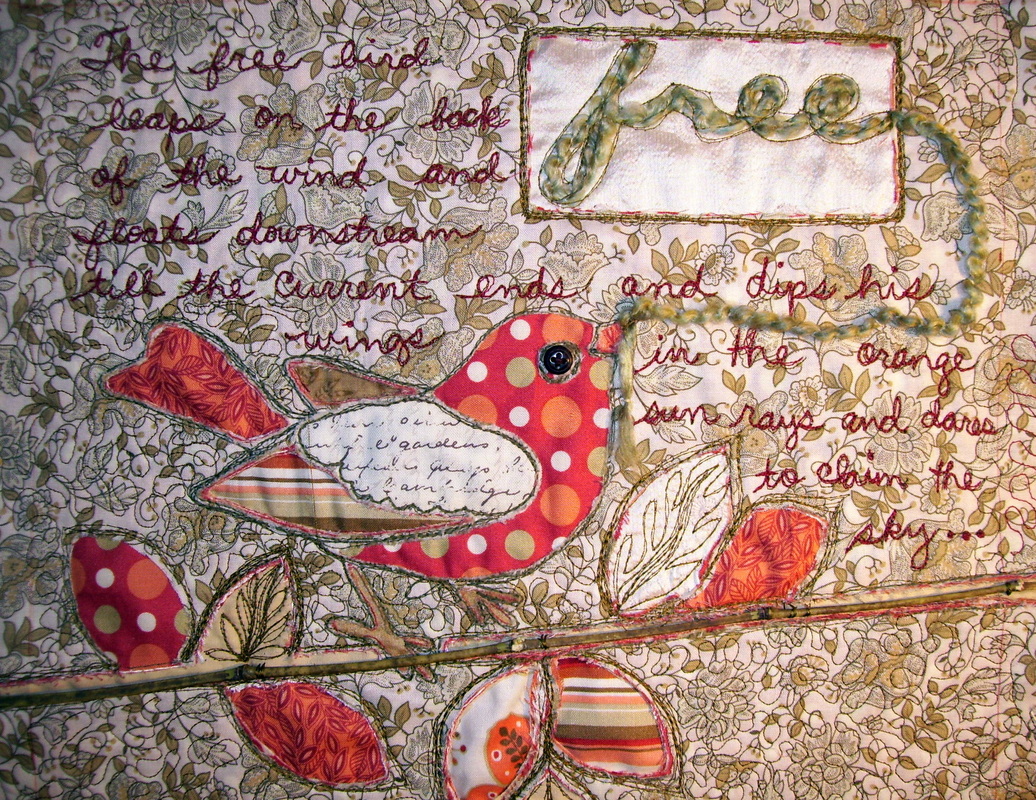
New small piece completed and added to the shop. This piece was sunprinted with leaves first, then Arashi Shibori was used with black ink to give the water effect. Then the leaf was thread painted on using free motion quilting; three copper colored squares are painted fusible; the "button" in top right corner is ceramic with a small piece of variegated yarn attached. Finally, background was thread painted to enhance the feeling/look of water under the leaf. 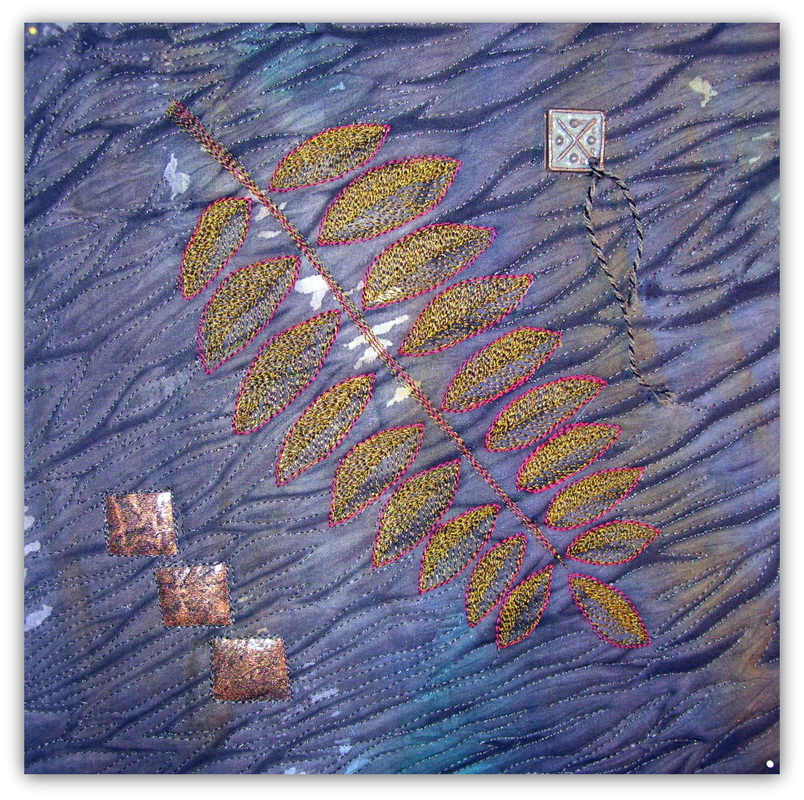
10 x 10 "Leaf on Water" Framed in black frame, so it's ready to hang. $65 with free shipping.
|

kimberly ollis
Forty something artistic soul finding her way through life discovering new insights almost every day through the gift of "making." View my Work
Archives
November 2014
Categories
All
Artists I Love
|
 RSS Feed
