I had some time to myself yesterday, thanks to my wonderful Mother and Father-in-law, so I was working on my Healing art quilt and had some thickened dye left over. I try not to waste anything, so I thought about what I could use it for. I have been missing deconstructed screen printing so much, I decided to get in there and have some fun! Carpe Diem!! Nothing in visual art grabs me and moves me quiet the way interesting textures and organic shapes do! And in my work I am constantly looking for new ways to make a new kind of mark.
This technique was one of the first I learned about as a new fiber artist, but as many of you know, every time you use a technique, you learn something new. If you haven't done this, try it, and don't have any preconceived expectations when you do. Just say, "whatever it looks like, that's what it is," and go from there. In my opinion, this technique produces some of the most interesting designs and patterns EVER in surface designing! Here's what I did, and how it turned out:
This technique was one of the first I learned about as a new fiber artist, but as many of you know, every time you use a technique, you learn something new. If you haven't done this, try it, and don't have any preconceived expectations when you do. Just say, "whatever it looks like, that's what it is," and go from there. In my opinion, this technique produces some of the most interesting designs and patterns EVER in surface designing! Here's what I did, and how it turned out:

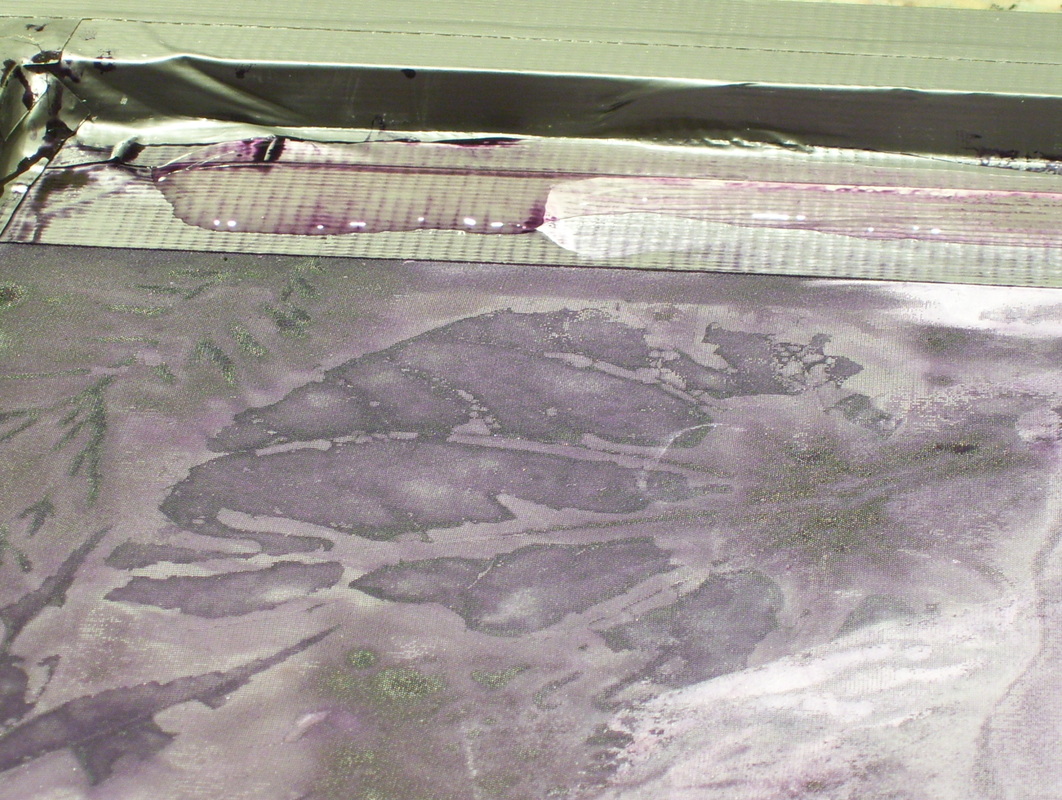
The first step in making a deconstruction screen (after the actual screen itself is ready--that's a whole other tutorial :), is to decide what flat objects you want on your screen to create the lovely texture you are seeking. I knew I wanted to use leaves in the foreground and something textural in the background, because you want to fill up your screen space if you can. Once you put your items under your screen on a print board, mix your dye color with your print paste (more on this later) and using a Squeegee apply the thickened dye to the screen making enough passes to saturate the screen. Leave everything as it is, removing nothing, but try to see if you can turn it over and let it dry overnight. You can dry it manually with a hair dryer, if you can't wait (I understand :) If you can't turn it over without disturbing it, then leave it upside down on the table to dry. I used tape, because the green safety screening did not want to lay down flat. This is the back of the screen after it had dried overnight. Sorry, I took the other two apart before I thought about snapping a picture.
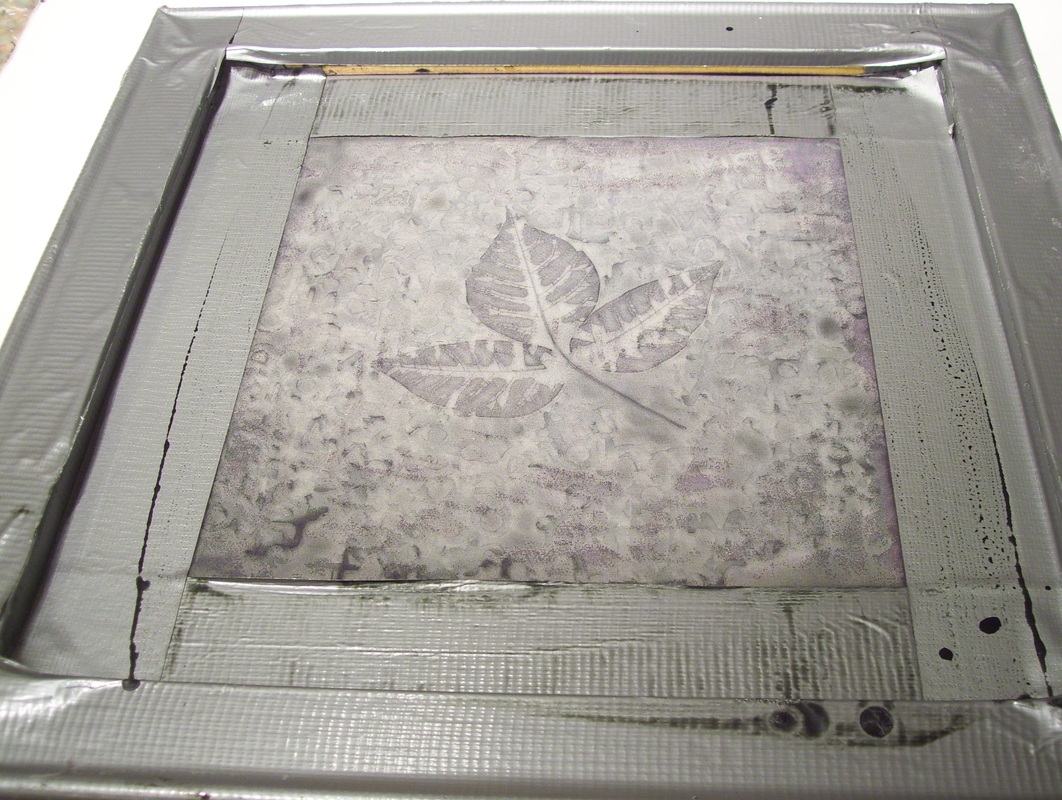
Here is my favorite little screen of the three. I think the little leaf trio in the middle is adorable. The background was created using some text filled scrap booking paper that I painted with house paint to make it reusable and washable. This screen is sage green.
| 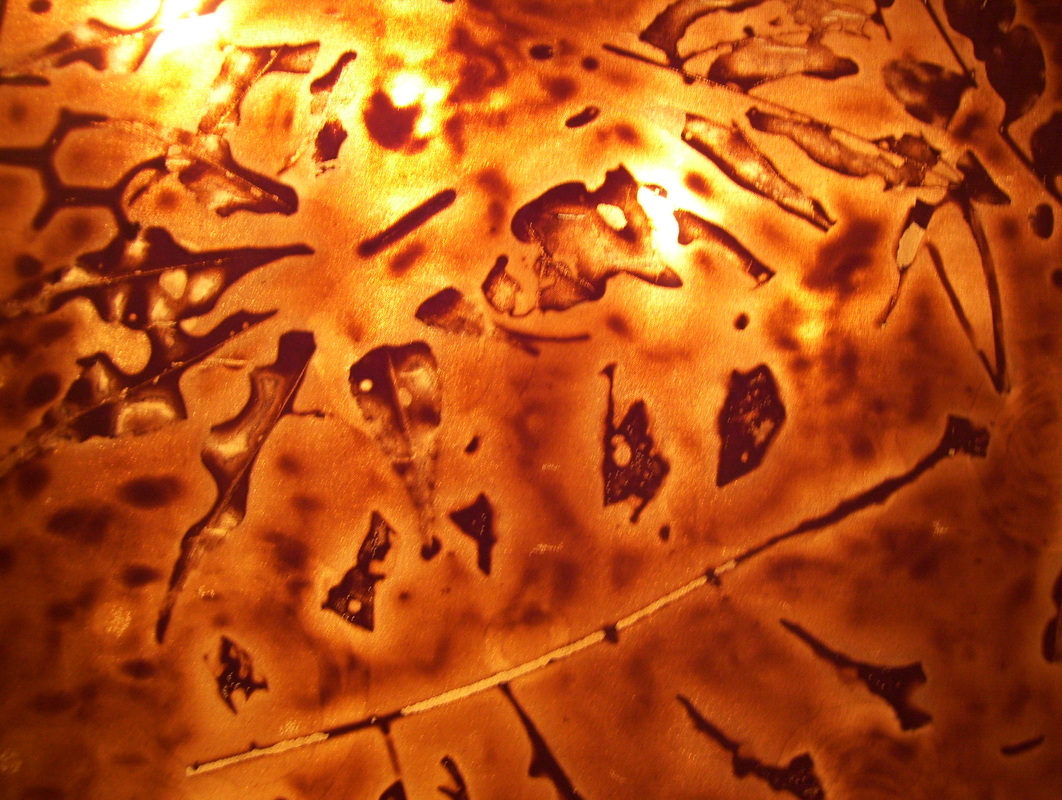
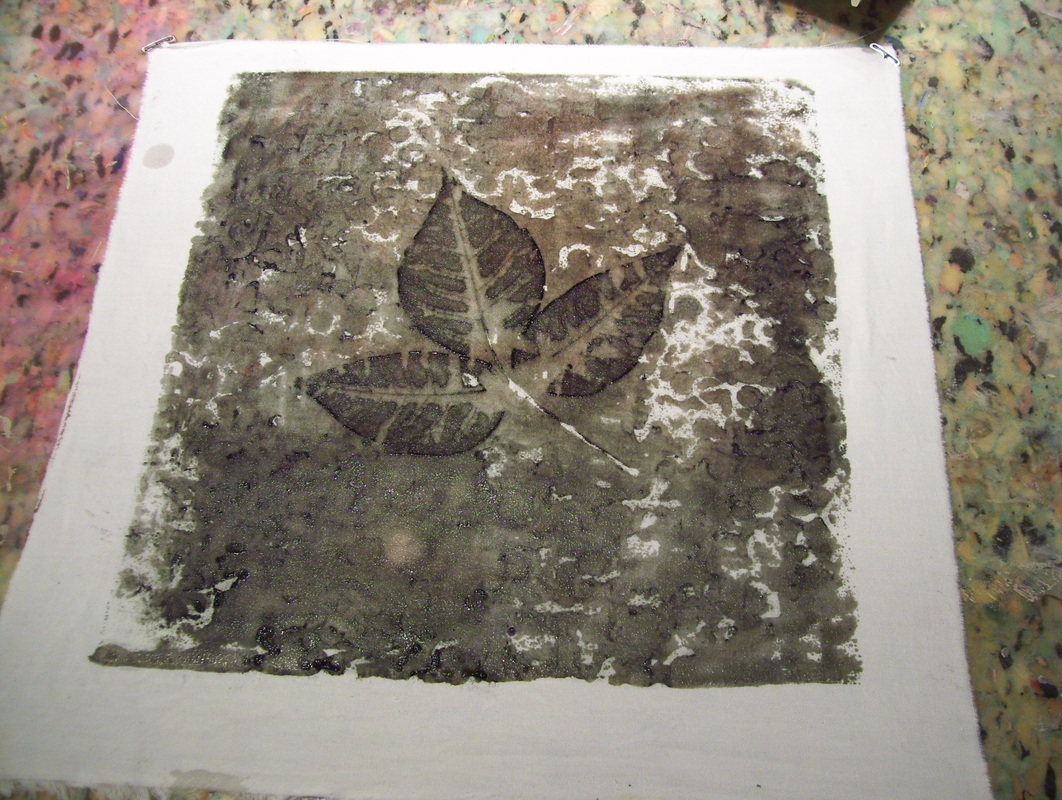
See what I mean about the unusual texture? I love it! This was done with my left over brown thickened dye. This is the screen you see above with the safety screen on it. The safety screen did not show up as well as I had hoped, because it was not making continuous contact with the silk on the screen.
| 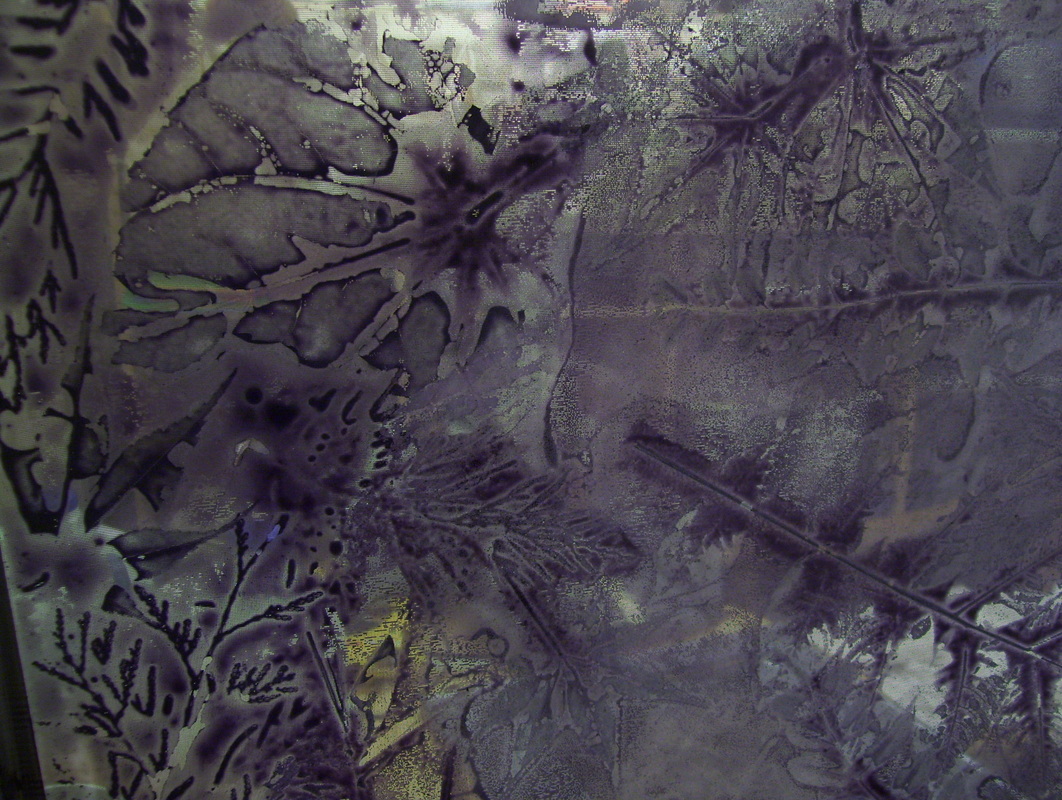
The final screen was the largest, and contained only a variety of leaves to create the interesting patterns. I love how these look! This one is a muted purple to match my studio where the art quilt will eventually hang.
|
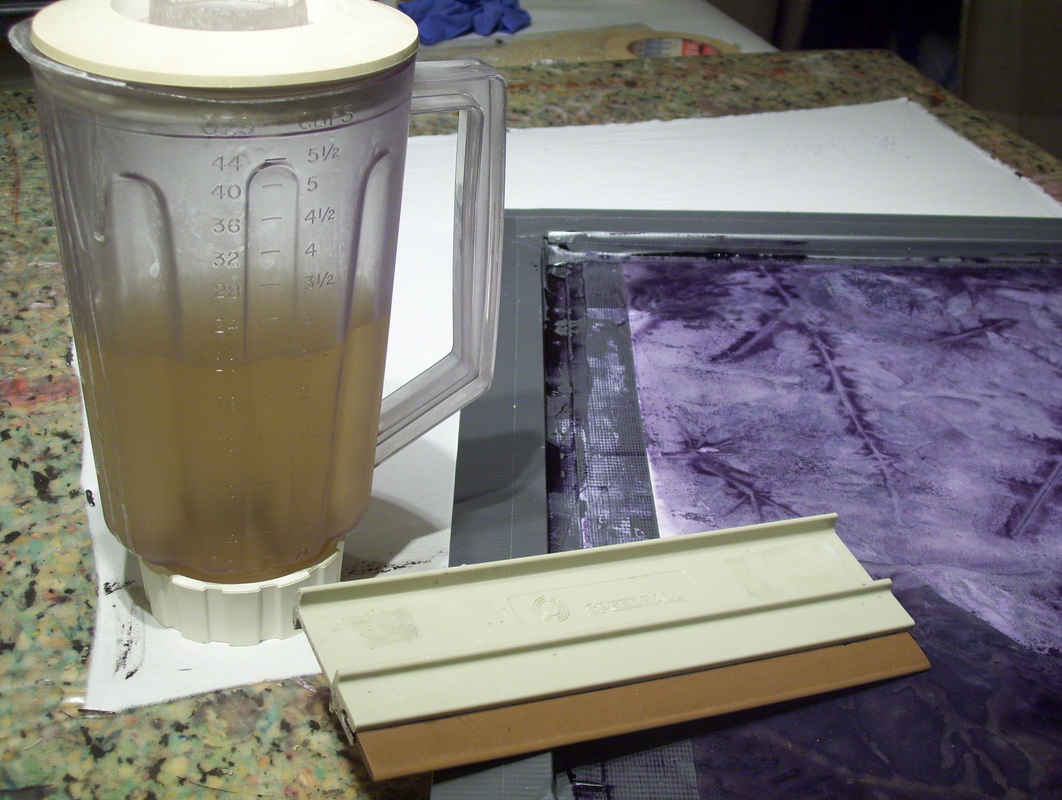
Now that your screen has dried over night, you will need pre-mixed print paste (clear is used here, you can also use another color of dye if you wish), a squeegee, your screen and some dry fabric that has been pre-soaked in soda ash solution (combine 1/3 cup of soda ash to one gallon of warm water and keep in an air tight container to be used until it runs out, soak fabric for at least 15 mins. then hang to dry--DO NOT PUT SODA ASH SOAKED FABRIC IN YOUR DRYER, YOU WILL HAVE TO BUY A NEW DRYER IF YOU DO!) Print paste is made in a blender using 4 tsp. of sodium alginate, 3/4 cup of urea and 4 cups of water, you need to make this at least 2 hours before you print with it and keep it refrigerated for best results.
| 
Pin your fabric to your print board or table with T pins, then pour your clear print paste in the "well" of your silk screen, as you can see that I've done here. It doesn't matter the exact amount, I just make sure there is some all the way across the screen, you can add more anytime you need to.
| 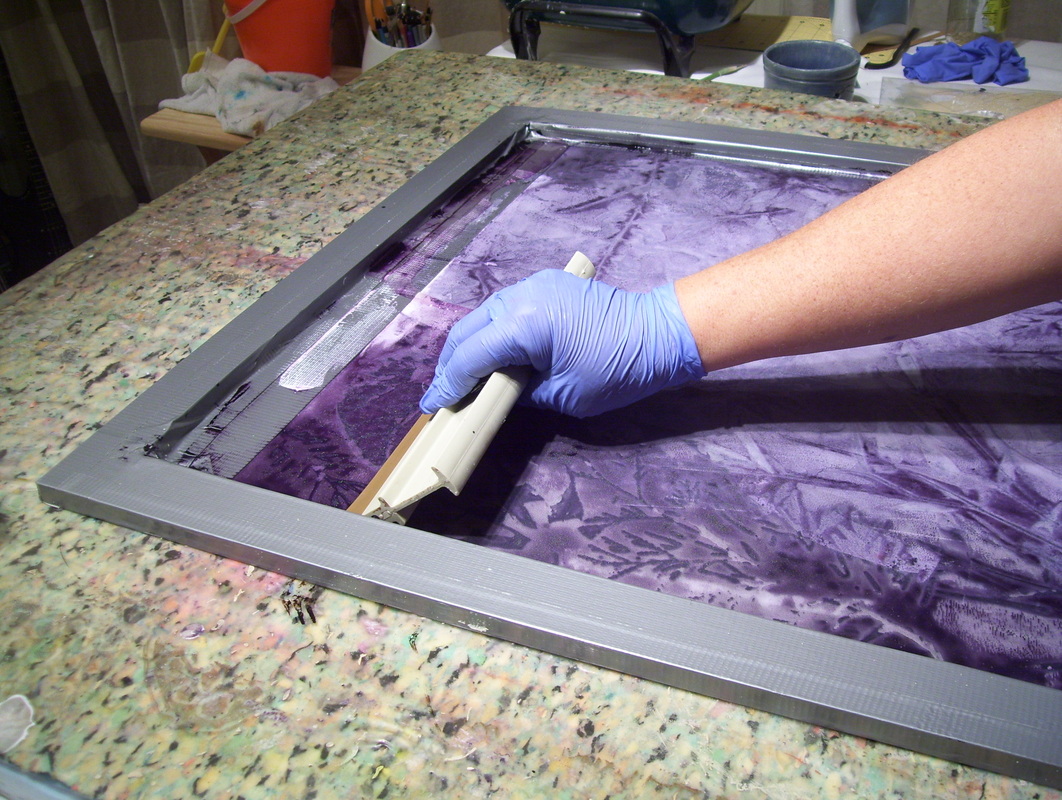
Wearing your gloves, hold the squeegee at about a 45 degree angle and drag the clear print paste across the screen, using a pretty good amount of force. You will need to make several passes to get the screen wet enough to transfer the dried dye to the new piece of fabric. As I said before, I used clear here, but you can always use another color of dye that has been thickened also to achieve another kind of look.
|
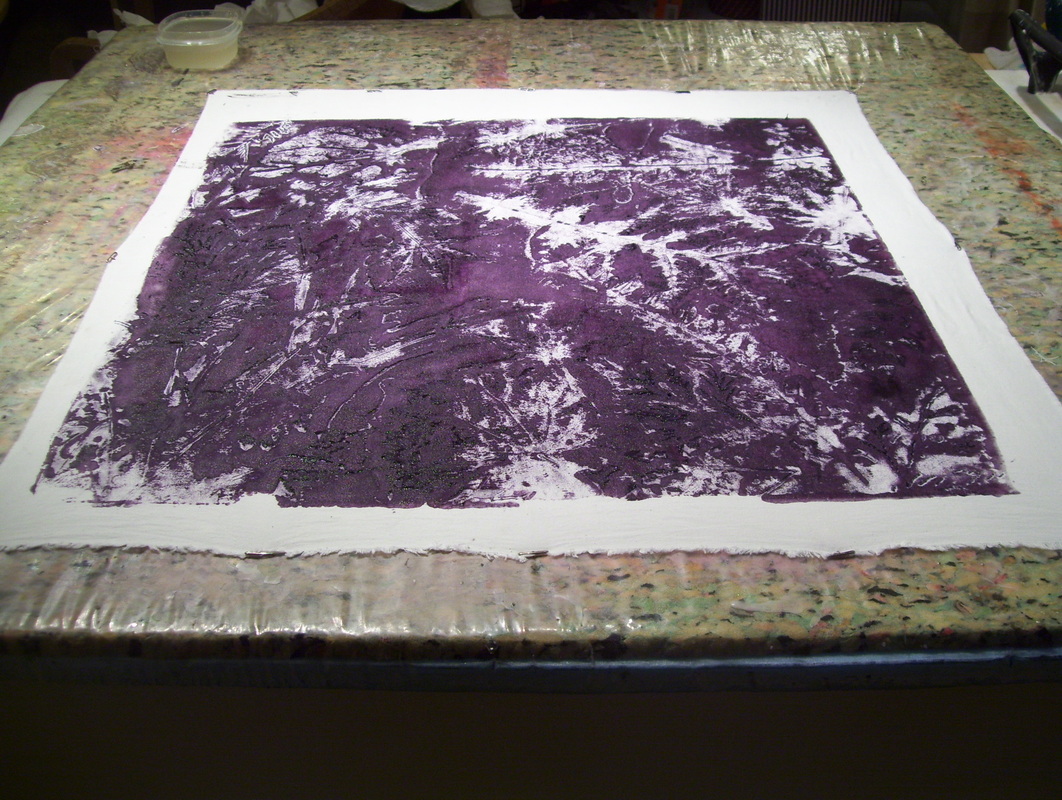
Here is what the printed fabric looks like. Purple was the screen color, then the white areas are where the dye color adhered to the screen and then transferred to the new fabric using the clear print paste.
| 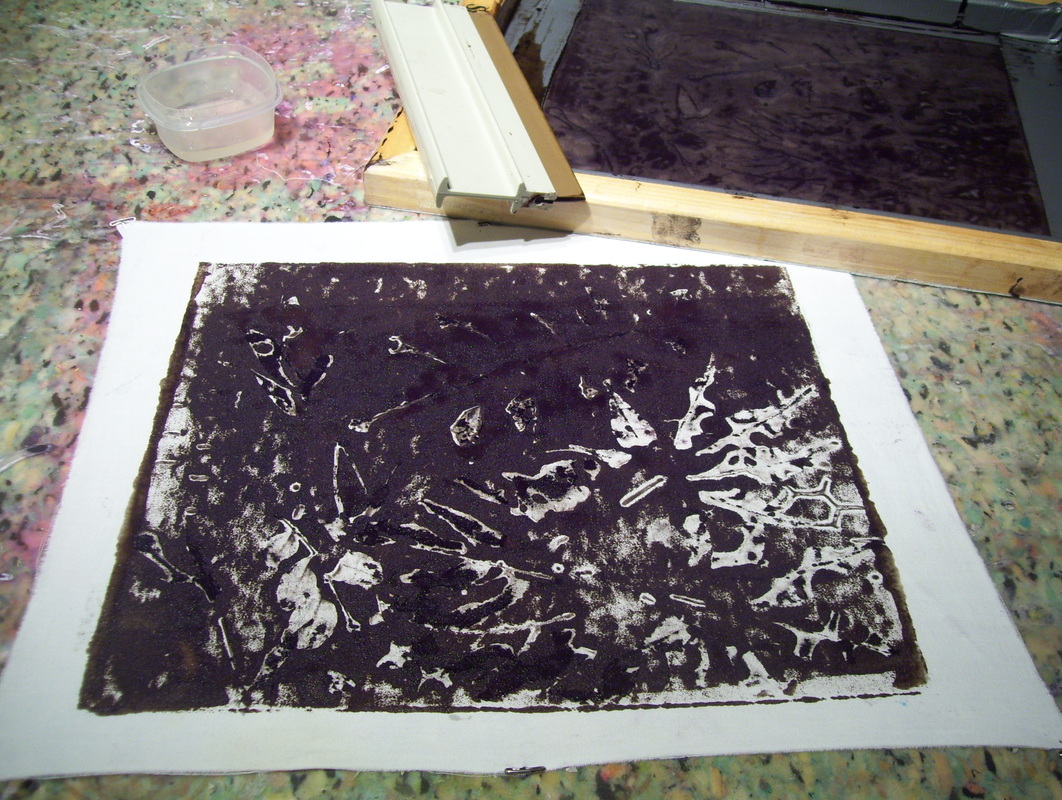
Here is the chocolate brown piece that looked lighter in the screen picture because I held it up to the light so that the patterns would show up nicely for the camera.
| 
Here is the little leaf cutie. Still my favorite. I hope this sagey, olivey green doesn't wash out too much, I really like the color!
|

You CANNOT forget this last part, you must "Batch" your fabric after you have done your screenprinting on it. It won't lose all of its color if you don't, but it will lose a lot of it, so don't forget. To batch fabric, you simply want to wrap it in plastic and expose it to heat of some kind, this will increase the amount of time that the dye has to interact with the fabric, making the molecular bond stronger and producing more vibrant and true to life colors. I use a heated blanket to batch my fabrics, I wrap each piece separately in individual pieces of plastic, wrap them up making them kind of air tight, and place them in the folds of the blanket and turn it on high over night. My blanket does not get very hot, so I have to use the high setting, which seems to work perfectly. I have also found it works great to put the wrapped plastic in the rear view window of the car outside, if it is hot outside. You have to find a way to expose the pieces to heat while they are bonding with the dyes. Some people steam their fabrics, but I'm not a steamer, I tried it and didn't like it...

I couldn't resist sharing this picture that I spotted while I was rinsing out some dyed shirts that I made for the Arts Center. It took me back to the days of when I started working with dyes in the kitchen about 8 or 9 years ago, and when I had to keep my print paste in the fridge upstairs, because I didn't have another place to store it. This is a "no-no," always try to keep your dye materials separate from your eating area, if you possibly can. I am so thankful to have a place now to work, which is NOT in my kitchen and dining room!
So, there you have it, Deconstructed Screen Printing, it's fun, it's fool proof , and it's very forgiving! Have a blast, and if you want to know more about it, check out Kerr Grabowski's DVD, that was my favorite place to learn about doing it! She's the creator of this technique and she is very entertaining to listen to and watch. Wait for the line, "dirty alginate, sounds like the name of a band," giggle, giggle--she is hilarious!

 RSS Feed
